This is the story of a recent project that I completed on my boat. It is a rather long, detailed, and sometimes tedious description of how things can go wrong and escalate during a seemingly simple project. This will not be unfamiliar to those who own a boat. For those thinking about buying one, read at your own risk. 🙂
For those unaware, in a boat the drains on the sinks generally consist of a hose that goes from the bottom of the sink to a hole in the bottom of the hull (called a “through-hull”). There is also typically a shutoff valve attached to the through-hull, called a seacock. These seacocks stay open unless there is a leak or unless healing1 in high winds causes sea water to come back up through the sink. But at anchor or in a marina, they stay open so that water can always drain out of the sink.
The problem is that because there is an open connection between the salt water and the sink drain opening, if the water itself smells (say in an anchorage with a lot of mud or sewage), the odor can waft up through hose, out the drain, and into the boat. Also, salt water contains all kinds of life which can find its way into the through-hulls and live (or die) in the plumbing, causing unpleasant odors.
I experienced this first hand when living aboard my boat at DIYC, which is located on the south shore of Tampa’s Seaplane Basin, a small cove populated by a couple dozen derelict boats and long-term liveaboards.

The liveaboards rarely (if ever) followed maritime sanitation laws (by using marina pump-out facilities to empty their holding tanks) but invariably empty their holding tanks into the basin when nobody is looking. For this reason, the water is known to be full of nasty bacteria–so much so that the Tampa Police dive-rescue team prohibits its personnel from entering the Seaplane Basin’s waters.
Serendipity has two sinks in her galley and one in her head, but until a few months ago, her head sink had no freshwater plumbing, so I was not using my head sink at all. Therefore, the head seacock remained closed.
However, last spring I noticed a foul smell in the boat that I couldn’t pin down. It would appear only at certain times, and I could only localize it to a general area of the boat. Finally, after it grew potent enough, I was able to determine that it was coming from my galley sink drains.
I jumped online to find solutions to “smelly galley sink”, most of which included using bleach or certain enzyme formulas, or just Drano, all of which proved ineffective. Each would kill the smell for a day or so after which it would inevitably return.
I do not like a smelly boat and so came to the conclusion that since the only likely remaining source of the odor must be old, encrusted drain hoses, I would have to replace them. Which I did. It ended up being a three-day, relatively inexpensive ($83) project. Almost all of the cost was the $7-per-foot, freshwater PVC hose which had to be specially ordered because of its unusually large diameter (1 1/2″). When I examined the old hoses after I had removed them, they did look a bit worse for the wear, but didn’t smell. And, unfortunately, about a week after changing out all the plumbing for both galley sinks, the odor was right back again. (sigh)
Inexplicably, a few months later the smell just disappeared and hasn’t returned since.
That was the first unnecessary project. Unfortunately, it is true that history repeats itself.
In October of last year, I finally ripped out all the old, no-longer-usable copper tubing that originally plumbed my head sink and replaced it with flexible, freshwater hose (a three-week project). Finally, after three years, I was able to use the sink in my head! The boat felt much more like a home when I didn’t have to carry my toothbrush, mouthwash, etc., back and forth to the galley every morning and every night.
Then, about a month ago, after being here in the Oriental marina for a couple of weeks, whenever I’d run water down the head sink drain, a very nasty, bitter odor would pour into the boat. It was very strong, but only lasted as long as the water was running. It was similar to what I had experienced with my galley sinks, but much stronger. Since I only had to put up with it for a minute or two each day, it wasn’t a high priority to troubleshoot.
But then it was arranged that my friend, Nicole, would be joining me in a couple of weeks when I start cruising the Chesapeake, and she has a very sensitive nose. I knew that I needed to find a solution before she came aboard. So, like the galley sinks a year before, over a couple weeks I tried all the chemical treatments, and just like the galley sinks, none of them worked. I even had the diver who cleans the bottom of the boat give the through-hull a good reaming out in case something had crawled up there and died. All to no avail.
What I really wanted to do was just wait, figuring that–just like the galley sink drain smells–it would eventually go away on its own, and was likely just a function of sitting in the marina for so long. I was hopeful that once I got moving again, the problem would go away.
I also have this aversion to starting any project on the boat, because historically (i.e., in my early adulthood because of having no handyman experience), me trying to repair or install things in my house always made things worse and more costly. Over time, I’ve been slowly losing this attitude as I develop some skills and have successfully completed many boat projects, but there is still some inertia that I must overcome when starting projects, especially those involving skills I do not yet possess.
I had the same feeling with this project: I should just leave well enough alone. Although it did not require any new skills on my part, I just didn’t have a lot of faith that replacing the hose was going to solve the problem. Also, on a 44-year-old boat, even seemingly simple projects can escalate as unexpected things break during the project due to wear, corrosion, etc. And the project turned out to be the perfect example of that.
Yet, the fact that I was soon to have a guest aboard, and that I currently had a lot of free time here in Oriental eventually overcame the inertia, and I began the project.
This project should have entailed simply removing the old hose and installing a replacement hose. This in and of itself is a simple job, taking perhaps an hour, and for the 2′ of hose, cost only $15. But, alas, it was not to be so simple. Not even close. The “hour-long job” ended up taking two weeks and costing $250!
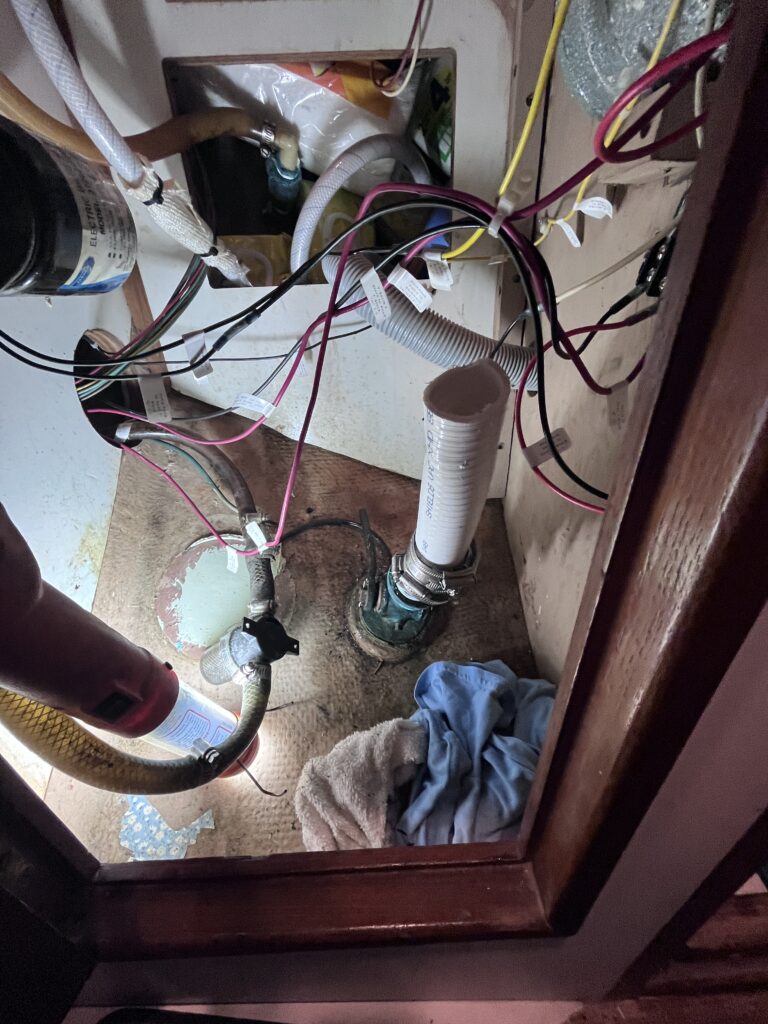
Removing the old hose did indeed prove simple, except for the fact that I had to cut away some of the hose to get it off the seacock (not unusual). However, upon close inspection, neither the hose itself, nor the seacock smelled! Hmmmm….. 🙁
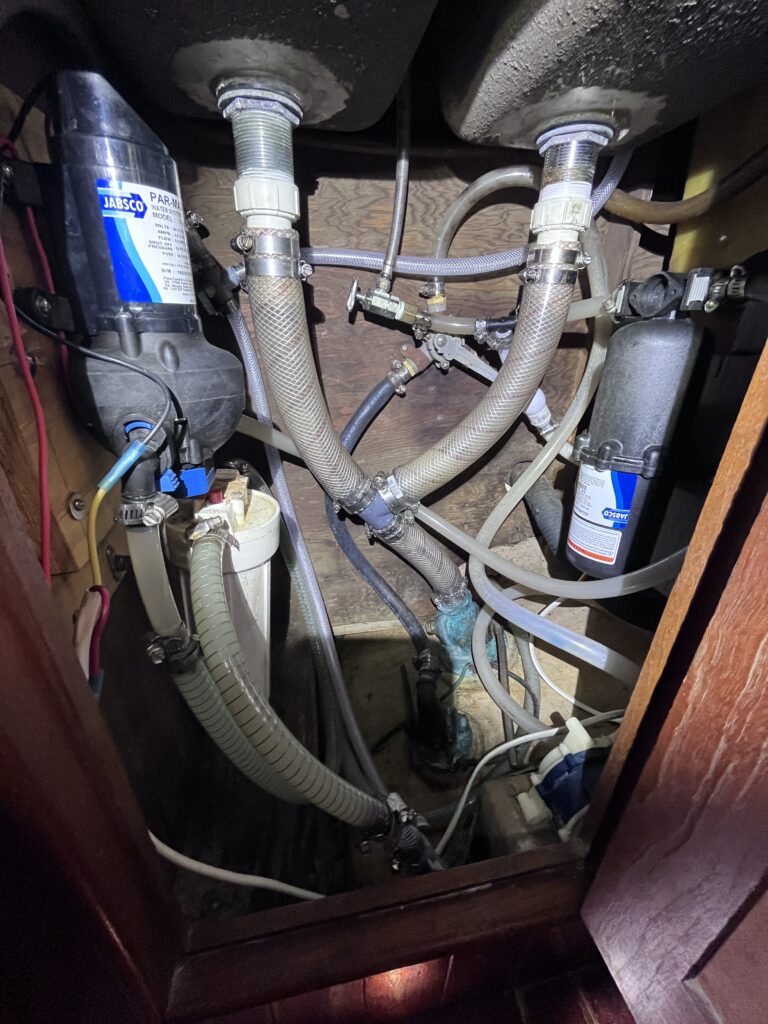
What I wanted to do was replace the existing very stiff, engine hose the the previous owner had installed with reinforced PVC freshwater hose–the same hose I had used in the galley. It was still strong enough to use below the water line, but was more flexible and transparent, so would allow me to always see where the water level was in the hose (and whether anything else was in there.) The flexibility part was especially important since the seacock was facing away from the sink drain by about 30 degrees (due to the slope of the hull), requiring the hose to have a significant S-turn in less than two feet.

The problem was that nobody in town had 1 1/2″ PVC. (Nobody in Tampa Bay had, either. back in October.) I would have to special order it again. However, when I went back to my old resource, they were out of stock for “three to six weeks” (which meant eight). In fact, after conducting extensive searches online, I could find only a single source of 1 1/2″ PVC hose (Defender), and they sold it only in 10-foot increments (at $7 per foot!). But, I needed less than two feet, so I sought another solution. (Trying to be frugal is another thing that almost always ends up costing me more in the long run, as it certainly did in this case.)
Another trip around town to find an acceptable alternative led me to three 1 1/2″ options: bilge hose, engine hose, and sanitation hose (used in marine toilet systems). I had already ruled out engine hose as being too stiff. Bilge hose was very flexible, but because most of the hose would be below the boat’s waterline, it wasn’t reinforced enough2. That left sanitation hose. It was strong enough, but was almost as stiff as the engine hose. But, it would have to do. So, back to the boat I went with 2′ of white sanitation hose.
And then the challenge began: How to get this stiff hose to bend almost 90-degrees twice in opposite directions in less than two feet. If I forced it too much, it would collapse into a fold, which would restrict water flow. Using a heat gun to soften it up helped a bit, but it was really just too small of a space to make it happen. Indeed, before I had removed it, the old engine hose had a significant kink in it, which the previous owner had tried to mitigate by squeezing it open as much as possible with a hose clamp. But this was a poor solution, and I wondered if the constriction in the hose might have been a cause of the odors. I didn’t want to repeat that if possible.
In the end, after a lot of struggling on my back, judicious use of a heat gun, dish soap, and as much muscle power as I could muster, I was able to force the hose on to both the seacock and the 2″ long “nipple” coming off the sink drain. After tightening up all the hose clamps, I was very satisfied with my work (and the fact that other than the multiple trips around town, the project had only taken a couple of hours.) Now all that was left to do was test it for leaks.
And, of course, it leaked. Right where the drain came out of the sink. It appeared that the water was coming around the rubber gasket that sealed the drain module to the bottom of the sink. Evidently the tremendous sideways pressure caused by the stiff hose being forced into position had caused the drain module to shift or at least tilt enough to allow water past the gasket. That would require tightening up the drain module against the bottom of the sink, something that would hopefully just require a couple of turns of a wrench.
Alas, it was not to be. The small area under the head sink made it very difficult to use the large wrenches necessary for the job. With what little leverage I had, I could not get the drain module retaining nut to turn at all. It was then that I realized with dread that the only solution would be to remove the sink itself so that I could attempt to tighten up that fitting when I had more leverage. That would also mean removing the hose I had just “successfully” installed. (sigh)
The sink seemed to be held down to the countertop by four wing nuts on the underside of the countertop which were attached to four bolts integral to the sink itself. The problem was that these nuts were very corroded–just little piles of rust, actually. They were also very hard to reach, and for two, I needed a mirror just to see them! I was worried that these might crumble as I tried to loosen them which would turn this already escalating project into a major pain in the butt. So before attempting to loosen the wing nuts, I sprayed them with penetrating oil and let them soak for a few hours, during which time I removed the sanitation hose. Unfortunately, like the previous engine hose, I had to cut it to get it off, meaning I now had no more hose for the project. 🙁
Upon returning a few hours later, with a little effort I was surprised to be able to remove all four wing nuts, and with a bit more effort, was able to pop the sink up and out of the countertop. It had been sealed/adhered to the counter with some kind of substance that was applied around the outer lip of the sink. Perhaps silicone? Luckily, very little had adhered to the countertop, so prep when replacing the sink would be minimal.

With the sink now free, I grabbed my big wrenches and attempted to tighten the drain retaining nut to push the rubber gasket up tighter against the bottom of the sink. But, it would not budge! There didn’t appear to be any corrosion, so I feared that the nut might have been cross-threaded when installed. After struggling for awhile, I came to the very frustrating conclusion that since I couldn’t tighten up the nut to stop the leak, I was now going to have to buy a replacement sink and drain module!
That led me to an extensive online search for a sink which would match the dimensions of the hole in my countertop. I carefully measured and re-measured my existing sink’s dimensions, but despite days of searching, the closest match I could find seemed to be an almost exact duplicate (in appearance) except that it was 1/4″ bigger in diameter. It was only $62, compared so some of the others which were over $120, so I decided to chance it. I also ordered a matching drain, then decided, since attempting to install hose that was too stiff was what had caused the leak, to bit the bullet and order the 10-foot roll of $7/foot PVC hose from defender. All three things, with tax and shipping, came to over $200! While waiting for the items to arrive, I cleaned the remaining old sealant from the countertop with a scraper and acetone so that it would be ready to receive the new sink and removed the remaining sanitation hose.
Three days later, the sink, drain, and hose arrived, and I went back to work. The first thing I did was see if the sink was the right size. It was not. It was too large. Seemingly by a lot. Using it would require cutting away a lot of the countertop, and even then it seemed like the edge closest to the faucet wouldn’t have enough room to seat because it would hit the faucet! I really didn’t want to start cutting away my countertop, so decided to go back to the original sink (which I had wisely kept), to see if it could be salvaged.
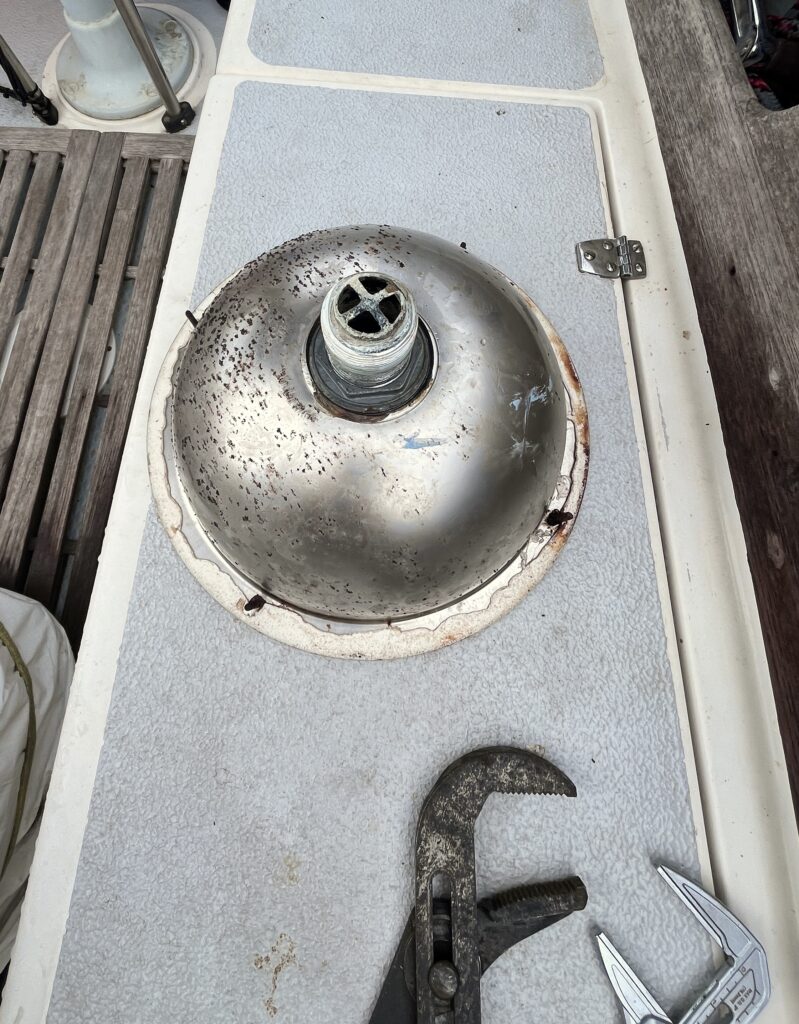
Upon closer examination, it appeared to be in fairly decent shape. There was a bunch of surface rust on the underside, and the sealant/adhesive was still stuck all over the outer lip, but it might be worth trying to salvage it.
But, it still leaked where the drain attached to the sink, so I would have to fix that first. The drain retaining nut still wouldn’t budge, so I pulled out the penetrating oil again, applied a generous amount, and let it sit for a couple of hours. When I returned, I was pleasantly surprised to find that with a lot of effort, I was eventually able to remove the old drain. (I planned to use the new drain with the old sink.) So, this looked hopeful!
I spent the next hour removing as much of the rust as possible using steel wool and stainless steel polish. I noticed some minor pitting in some places, but none of them seemed critical. Removing the sealant was a much more difficult and time-consuming task. Using a screwdriver and plastic scraper, I was able to peel off 90% of it, but there were still remnants of it all around the lip. This is where I would need to apply fresh sealant when re-installing the sink, so it needed to be clean and free of any oils, silicone, etc. But nothing I tried would remove whatever this stuff was! I tried mineral spirits, I tried acetone. Nothing. I tried alcohol. Nothing. I was finally forced to pull out my Dremel tool and with a wire polishing head, was able to sand off most of it. That took another two hours. In the end, the sink looked pretty good, and ready to have the new drain attached to it.
This involved simply inserting the new drain module into the hole at the bottom of the sink, then tightening the retaining nut underneath which would pull a rubber gasket up tight against the bottom o the sink, making a waterproof seal. It was at this point that I discovered something very depressing: There was an 1/8″ crack in the sink on the ring just outside the diameter of the drain nut. This is what had been leaking, not the gasket being too loose! I realized the sink was ruined, with no long-term way to fix such a crack, and that I had just spent 3 hours prepping it for no reason! Arrrrrgggghhhh!
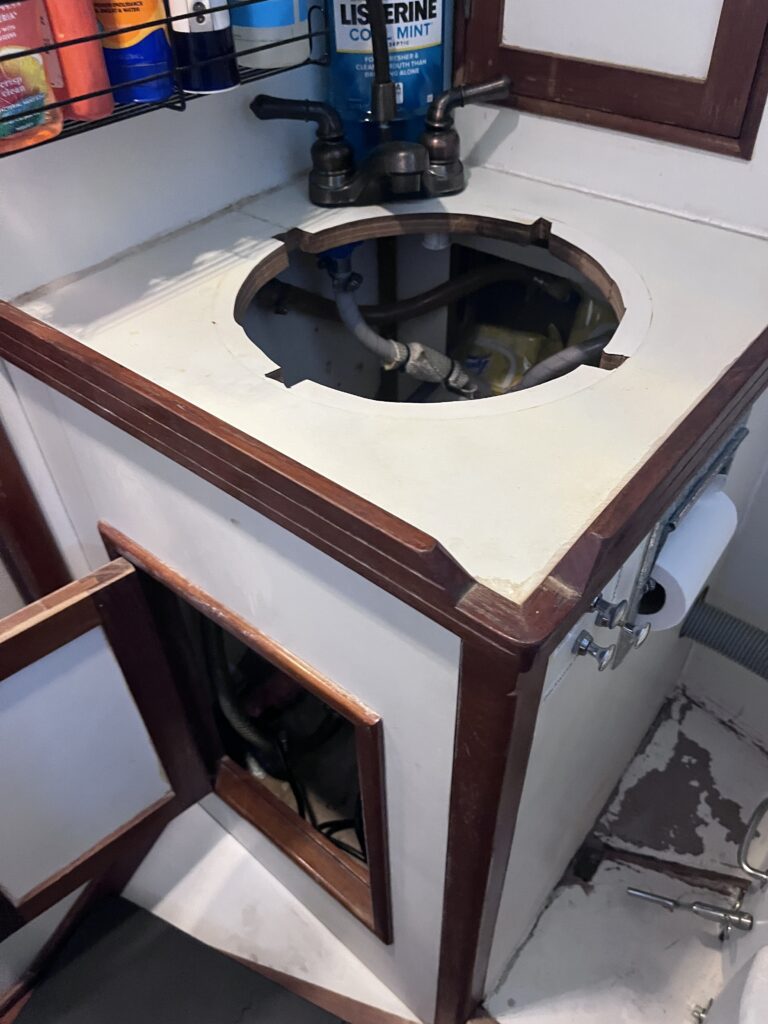
The only solution now would be to use the new sink, and that would mean major cutting into the countertop. However, I did discover that it actually wasn’t as much too large as I had originally thought. It hadn’t wanted to fit into place because the four, integral screws used to secure it to the countertop were slightly offset from where the old sink’s screws were, which was preventing it from being seated. It appeared that if I just enlarged those screw slots in the countertop, it might seat. I pulled out the jig saw, enlarged the screw slots, and tried it again. Much better. The new sink almost completely seated. With some a bit more trimming around the circumference of the hole, I was able to get the sink to seat fully on the countertop. Success! I would at least have a new sink and drain when it was all done.
Next, it was figuring out how to size, cut, and attach the PVC hose between the bottom of the drain and the seacock. And this is where I started getting nervous. Because the crack in the old sink was no doubt caused by the strong sideways pressure from the curve of the stiff sanitation hose I had installed. It had pushed/tipped the drain module sideways, which caused the thin metal around the sink drain to crack.
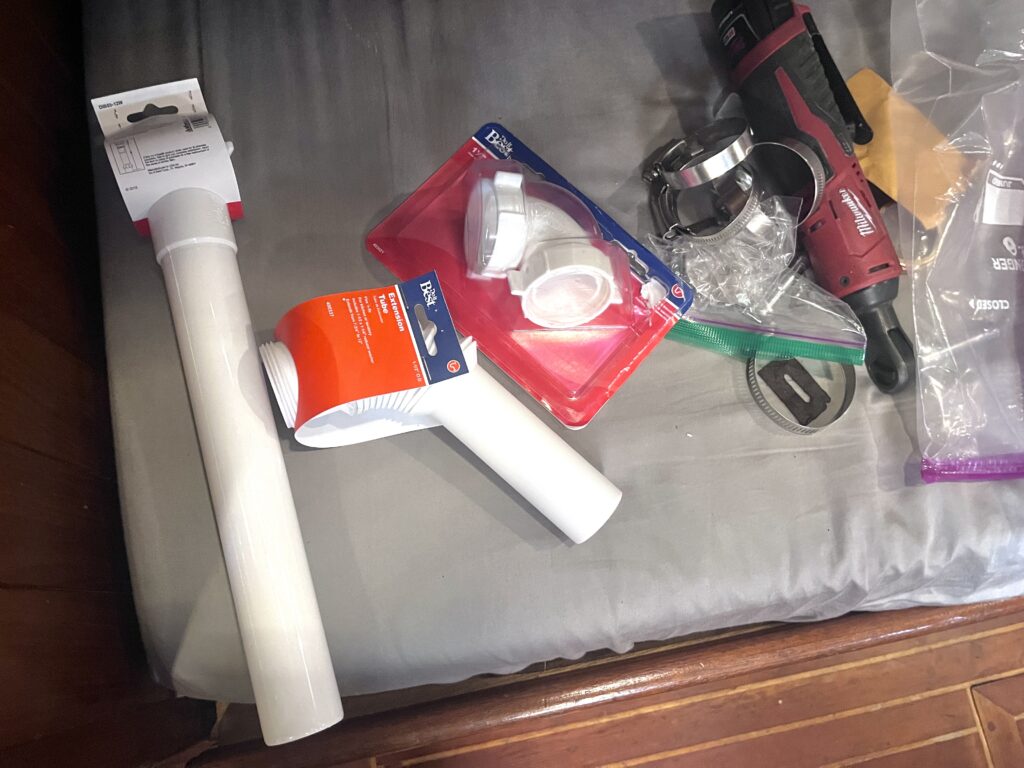
I worried that this could happen to my new sink. The new PVC hose, while a bit more flexible than the sanitation hose, was still quite stiff–much more than I remembered. (Perhaps that was because the galley sinks’ drain hoses didn’t require any tight turns.) The closer I examined the space and the impossibly tight turn radii, I realized that I didn’t want to force the PVC hose into position like I had the sanitation hose. I needed to find another solution. So, off to the local hardware store’s plumbing section I went.
After three trips there over the next couple of days, through trial and error, I was able to find a combination of connections and plastic pipes that would obviate the need for a tight hose radius.
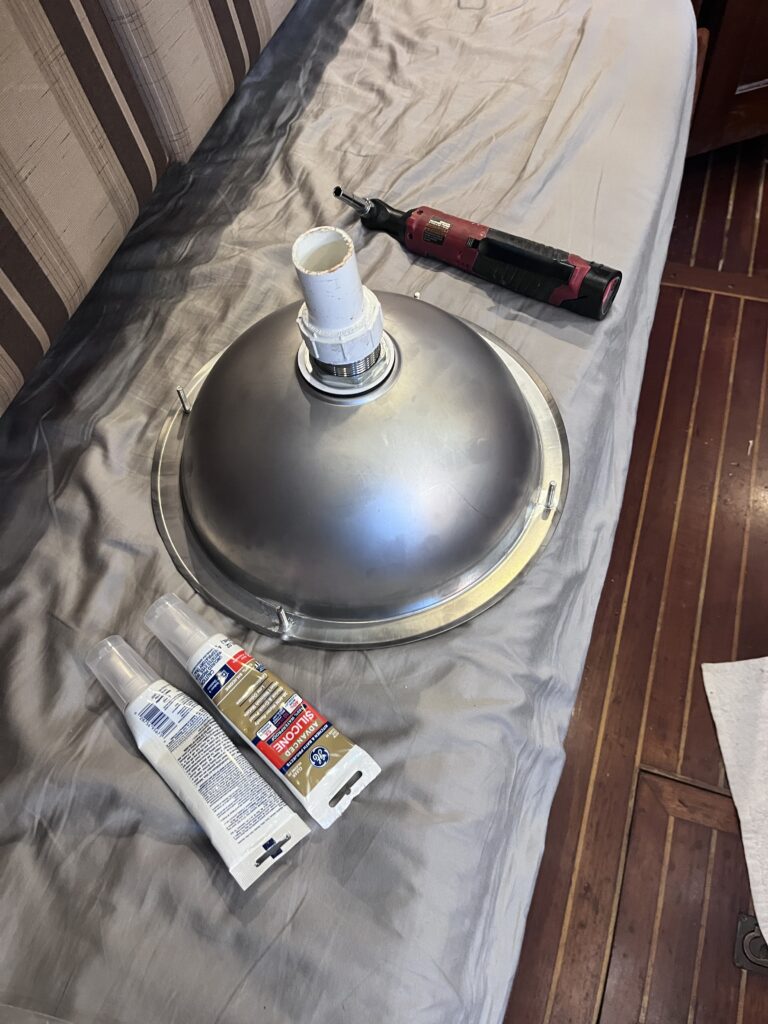
One other issue was how to seal the sink on the countertop. I planned to use silicone to fill up the lip of the new sink, similar to what the previous owner had done with the old sink. But, how to hold the sink while maneuvering it in place without making a mess with a 1/2″ wide and 1/4″ thick bead of silicone all around the rim, when holding the rim would be required to lower the sink into the hole? I devised a method of running a string down through the drain so that I could use that to lower the sink into position without touching any of the silicone. I practiced this a few times before applying the silicone.
And what a complete mess I made of doing that! I would have preferred to do it outside, but it had been raining all day, and I really wanted to get this project done. So, laying the sink upside down on the cabin floor, I readied two partially-used tubes of silicone together with a new tube I had grabbed from the hardware store. (It was going to take a lot of silicone to fill up the lip far enough to make a waterproof seal.)
A problem soon presented itself: The old tubes’ openings were sealed shut, so I would need to cut the tubes open to get at the still-useable silicone in them. So, grabbing a pair is scissors, I cut off the entire top of the tubes, and then, not wanting to deal with any tools, I just dipped my fingers into the tube and started glopping and spreading the silicone on the lip of the sink. This process got increasingly sloppy as my fingers began accumulating silicone, and as silicone started getting all over things, including the floor. The directions said that I had only five minutes to manipulate the silicone once I began, so I didn’t have time to try to make things neat, but just pushed forward to get the enough silicone on the lip of the sink and get it lowered into position using the string before the silicone started setting.
While the tactic with the spring proved successful, afterwards I had to clean up the mess that I had created in the cabin. There was silicone all over the place: on my hands, on my clothes, on my tools, on the floor. (This was reminiscent of all the times I’ve changed my engine oil!) I eventually got everything cleaned up, except that my cabin floor was now like an ice skating rink because there was a thin film of silicone on it that would not come off. I tried using mineral spirits to get it off as the directions stated, but was worried that if I used too much or left it on too long, it might start removing the varnish on my teak floor. So, for the next week or so, until the silicone finally wore off, I was slip/sliding around my cabin. Luckily, I wasn’t at sea!
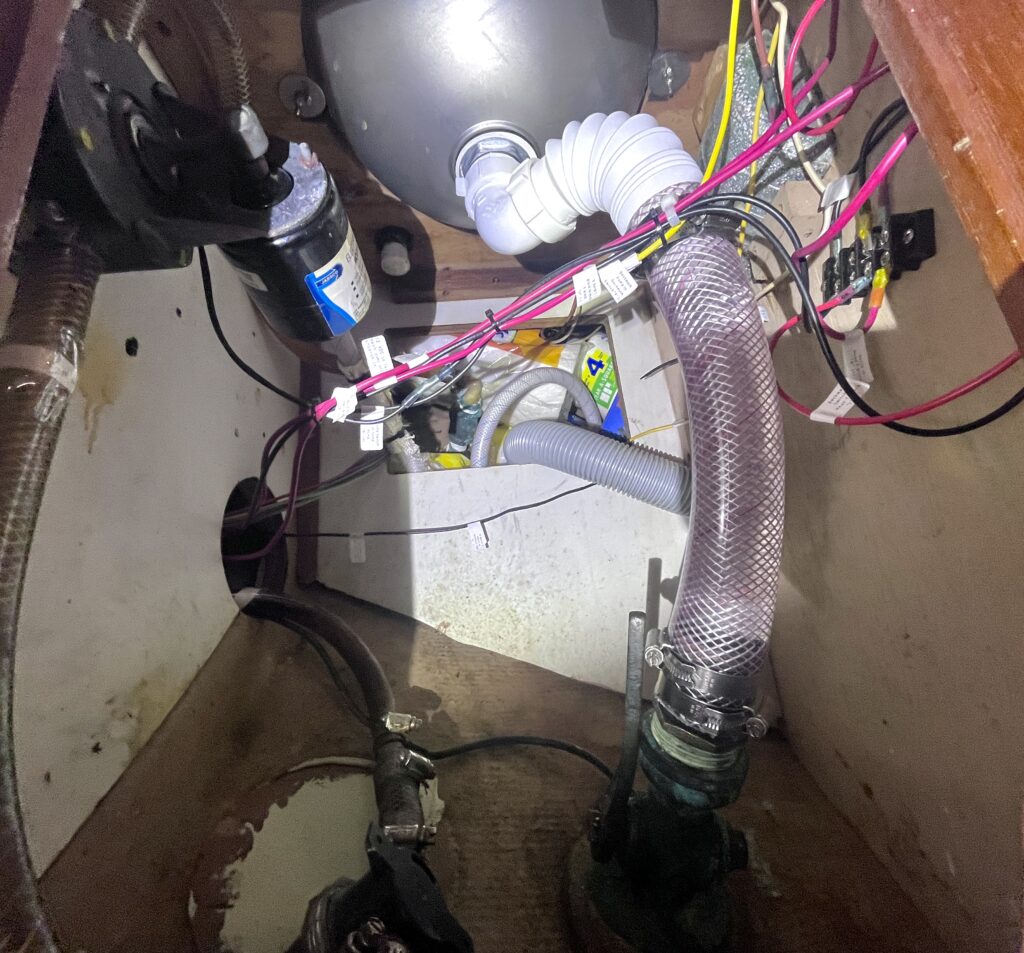
Putting all the plumbing pieces together proved (for once) to be fairly simple. And, joy of joys, when it was all done, nothing leaked! The new setup required an almost 90 degree turn in the system, so the water didn’t drain out of the sink as quickly, but at least it worked!
Cleaning, vacuuming, and putting the tools away took another two hours, then it was time to see if the odor was still there.
It was.
So, all that work, all that time, all that expense, all the walking 3/4 of a mile back and forth to the hardware store and 1/2 mile to the mail pickup–all of it–was for NOTHING!
To be honest, this wasn’t a surprise, since I suspected from the beginning that replacing the hose wouldn’t solve the problem. But, it was still frustrating and disappointing.
And, that’s not the worst of it. Oh no. I am very embarrassed to admit that it was all for nothing for another, even more simple reason:
Two days later, after once again having to endure the smell each time I brushed my teeth or washed my hands in the head, I had a very depressing realization. I had learned during the installation that the seawater level when the seacock was open was about 3/4 of the way up the PVC hose, which was about 2/3 of the entire distance between the seacock and the drain. So, a lot of water just sitting there. Yet, as soon as I started putting water down the now-much-slower new drain, I would smell the nasty odor. It seemed impossible, if the smell were coming from the seawater outside the boat, that it could somehow permeate so quickly through all the water sitting in the hose. What was going on?
Then it hit me.
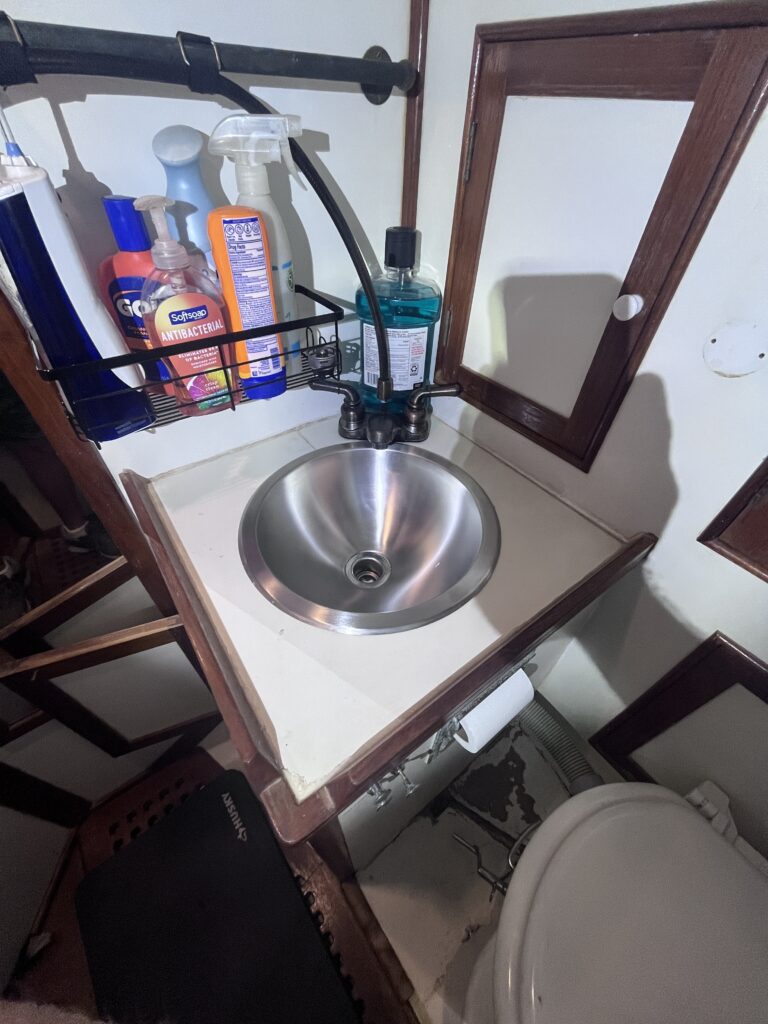
Oh, no. No. No. No, no, no, no, NO! Please don’t tell me…. I bent over, put my nose right below the sink faucet, turned on the water, and was immediately hit with the foul smell. The odor was coming from the freshwater system inside the boat! It wasn’t the drain at all! (At this point, I started laughing hysterically and uncontrollably and had to be taken away in a straight jacket.)
How this could have happened, I still don’t understand. It is not unusual for the freshwater systems in boats to occasionally get bad odors, especially in the warm summer months. From one of the industry experts in this field:
“Fresh water system problems–foul odor or taste–are typically caused by allowing water to stagnate in the system. Although most people think only in terms of the tank, the plumbing is actually the source of most foul water, because the molds, mildew, fungi and bacteria which cause it thrive in damp dark places, not under water. “
I knew this, and in fact, routinely conduct semiannual bleach/vinegar flushes of my entire freshwater system to keep everything fresh. I have done this since owning the boat with great success.
And, I am absolutely sure, when I initially smelled the odor coming from the head sink, that the first thing I would have suspected was the water coming out of the faucet, and so had done the same sniff-the-faucet test. But, it didn’t smell then! I am sure of it! Well, pretty sure.
Perhaps not. There had been no odor coming from the galley sinks, which meant that the smell wasn’t coming from the freshwater tanks and that might have thrown me off. But, what I now realize, as stated above (“the plumbing is actually the source of most foul water”) that the growth must have occurred in the 30 feet or so of 1″ hose that I had installed to plump the head sink a few months back. It was a long run of hose, I didn’t use the sink very much (water flow helps prevent growth), so it suddenly all made sense. And just as suddenly, I realized that I had really done all that work and spent all that money for nothing because I had been targeting the wrong problem the entire time! All I needed to do was one of my semiannual flushings of the system. Sure enough, when I looked at my freshwater system maintenance log, I was due for one, anyway!
OMFG!
The only good thing to report after all this is that, having conducted the normal the servicing/flushing of the system, the odor is finally gone. Nicole will never know how much work I put in to provide her with a pleasant teeth-brushing experience!
- When a sailboat leans over due to the force of the wind on its sails. Water always seeks its own level, and sinks on boats are designed to be above the waterline–at least when the boat is level. This is why, even with the seacock open, water doesn’t come pouring into the boat through the sink drain. However, there are cases in some designs where, when the boat is healing far enough, the sink actually dips below the waterline and seawater can come up through the sink. In these cases, simply closing the seacock solves the problem . ↩︎
- It is important to have reinforced hoses whenever they are below the waterline because if a hose fails below the waterline, it will let water pour into the boat. ↩︎